Views: 0 Author: Site Editor Publish Time: 2026-11-11 Origin: Site
Replacing industrial dust collector filters is rarely a favorite maintenance task. Yet, getting it right remains absolutely critical for your plant operations. Improper filter replacement routinely triggers severe regulatory fines from agencies like the EPA or OSHA due to sudden emissions violations. It also directly causes unexpected system downtime and premature equipment failure. Poorly seated filters allow abrasive particulate to bypass the collector entirely. This essentially sandblasts your fan blades and severely contaminates the surrounding workspace.
This guide provides a rigorous, compliance-focused standard operating procedure for facility managers. You will learn the exact steps to safely remove old media and precisely install new ones. We also cover how to properly evaluate replacement options. Follow these guidelines to optimize your system's overall lifespan, prevent structural damage, and ensure peak filtration performance across all operational shifts.
Safety First: Lockout/Tagout (LOTO) and confined space permits are non-negotiable prerequisites.
Analyze Before Replacing: Premature wear indicates a need to upgrade media (e.g., transitioning to PPS filter bags for chemical resistance).
Precision Matters: Improper seating of cages or snap bands in pulse jet systems is the leading cause of bypass leaks.
Post-Install Verification: Always conduct fluorescent leak testing before bringing the system back online.
Do not blindly reorder the exact same filters year after year. First, you must thoroughly evaluate the actual condition of your spent baghouse filter bags. Analyze the removed fabric closely for specific failure signs. You might find excessive abrasion, severe blinding, or extreme chemical degradation. These symptoms tell a detailed story about your internal system conditions. By reading these signs, you prevent repeating past operational mistakes.
Next, determine if your current media still matches your operational realities. Industrial processes change over time. Facility upgrades often introduce different chemicals or higher gas volumes. If your facility now handles higher temperatures or acid-gas environments, standard polyester will fail quickly. Upgrading to PPS filter bags becomes a necessary step for these harsh conditions. This switch prevents rapid chemical degradation and protects your filtration efficiency.
You must also evaluate standard versus custom sizing. Sometimes original equipment manufacturer (OEM) filters underperform in retrofitted systems. Ordering custom dust collector filter bags provides an excellent solution. They adapt perfectly to unique housing constraints. They also handle highly specific dust loads effectively when off-the-shelf options fall short.
Finally, perform a strict inventory audit. Verify you have staged all replacement items before shutting down the collector. Missing a few cages, clamps, or tensioning tools will needlessly extend your maintenance downtime. Check all gaskets and sealants. Ensure your maintenance crew has immediate access to everything required for a seamless turnaround.
Failure Modes Analysis Chart
Failure Type | Visual Symptom | Likely Root Cause | Recommended Action |
|---|---|---|---|
Abrasion | Holes near the bottom or side seams. | Excessive upward velocity or bent cages rubbing the fabric. | Inspect baffle plates and replace warped support cages. |
Blinding | Hard, crusty surface; dust deeply embedded in fibers. | Moisture entering the system or inadequate pulse pressure. | Fix compressed air dryers; consider hydrophobic media treatments. |
Chemical Attack | Brittle, cracking fabric that tears easily by hand. | High acid or alkaline gases reacting with standard polyester. | Upgrade immediately to specialized chemically resistant media. |
Thermal Degradation | Shrunken material, darkened color, or melted fibers. | Operating temperatures exceeding the fabric's rated limit. | Install spark arrestors and switch to high-temperature fabrics. |
Begin your maintenance event by isolating all hazardous energy sources. Detail a rigorous Lockout/Tagout (LOTO) procedure for your maintenance team. You must kill electrical and pneumatic power to the rotary valves, main fans, and pulse valves. Failing to depressurize the compressed air headers can cause severe injury during maintenance. Always bleed the compressed air tanks completely dry.
Next, establish strict confined space compliance. Dust collector housings often qualify as permit-required confined spaces. Outline OSHA-compliant entry requirements clearly for all contractors and internal staff. Conduct thorough air quality monitoring inside the plenum before anyone crosses the threshold. Issue appropriate personal protective equipment (PPE). Workers absolutely need fitted particulate respirators, protective Tyvek suits, and sealed safety goggles.
Ensure the hopper is completely empty prior to any human entry. Accumulated material easily forms dangerous bridges across the sloping hopper walls. These dust bridges occasionally collapse without warning. A sudden collapse releases massive dust clouds and creates a highly dangerous engulfment hazard. Run the discharge augers or rotary valves until no more material exits the hopper.
Finally, preserve the surrounding environment carefully. Establish a clean staging area nearby. Lay down protective tarps. This prevents ground dirt from contaminating your brand-new filtration media. Simultaneously, create a safe disposal protocol. Hazardous dust-laden materials require immediate bagging. Seal the disposal bags tightly to prevent secondary airborne exposure across your facility floor.
Start the removal process strategically at the top of the clean air plenum. Carefully unbolt and remove the pulse blow pipes if your system uses them. Inspect these metal pipes closely for internal wear. Check for misaligned orifices. A misaligned hole shoots compressed air sideways. This off-axis air quickly destroys the surrounding fabric wall below.
Extract the internal metal cages next. Pull each cage straight up out of the tubesheet hole. Avoid pulling at a severe angle. Angled pulling warps the metal structure permanently. Inspect the extracted cages immediately upon removal. Look for broken vertical wires, heavy rust corrosion, or sharp metal edges. Sharp edges easily tear new material during installation. Replace any compromised cages immediately instead of risking your new filters.
Develop a highly clean bag removal strategy. Unseat the snap band forcefully or carefully loosen the top clamps. Fold the dirty fabric inward upon itself during extraction. This simple folding technique traps the built-up dust cake inside the fold. It dramatically minimizes airborne mess and protects worker visibility inside the housing.
Finish this crucial phase by cleaning the tubesheet completely. Use wire brushes or industrial vacuums. Wipe down the inner edges of every single tubesheet hole. Any residual dust, rust flakes, or old gasket material compromises the fresh sealing area. A perfectly clean metal edge guarantees your new filters will seal tightly against the tubesheet.
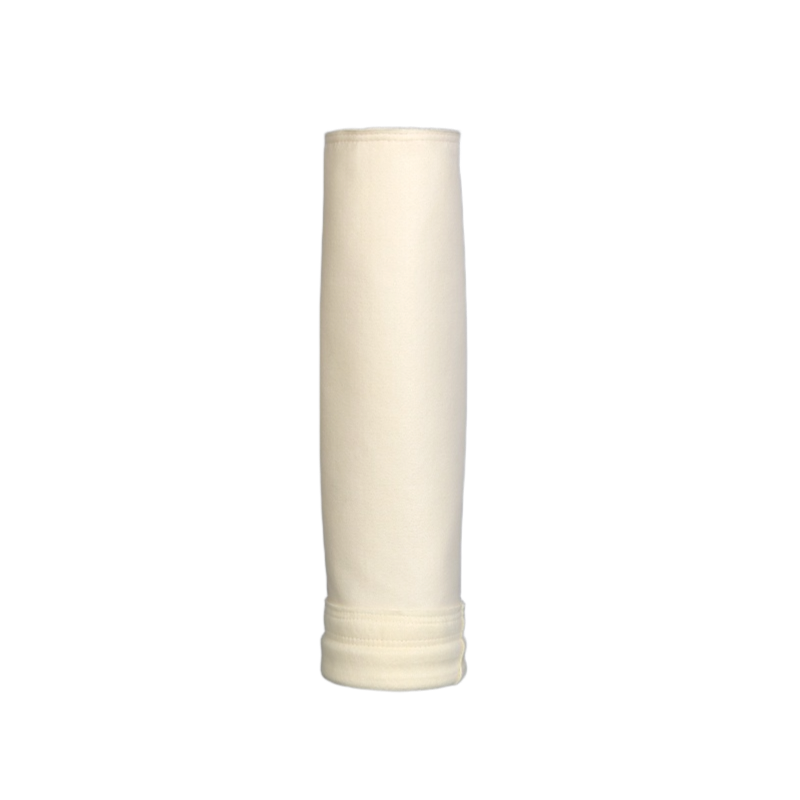
Lower your new pulse jet filter bags into the clean tubesheet holes extremely slowly. Never force them down aggressively. Avoid scraping the delicate external media against rough metal edges. Small micro-tears during installation drastically reduce the overall filter lifespan and cause immediate emission leaks.
Seating the snap band properly requires specific manual techniques. Follow these numbered steps to ensure a flawless seal:
Form the flexible top snap band firmly into a distinct kidney bean shape using both hands.
Carefully fit the internal groove of the band directly onto the clean metal tubesheet edge.
Release the band tension slowly and firmly press the rim outward until it audibly snaps securely into place.
Run your index finger smoothly around the entire rim circumference to verify a completely flush, crease-free seal.
Once seated properly, begin installing the support cages. Gently slide the cage downward into the suspended fabric tube. Do not force or drop the cage under any circumstances. Dropping it causes severe bottom abrasion against the reinforced fabric floor. Ensure the cage top seats squarely on the tubesheet surface or fits snugly within the specialized collar.
Reassemble the heavy blow pipes overhead. Bolt them down securely using the correct torque specifications. Ensure the pulse holes sit perfectly centered over every single filter bag opening. Off-axis pulsing directs destructive high-pressure air directly into the delicate side-walls. This easily blows holes through the fabric within hours of normal operation.
Never restart your industrial collector blindly. Always conduct a final comprehensive visual inspection first. Sweep a bright flashlight across the entire clean air plenum and tubesheet. Check thoroughly for improperly seated rims or raised cages. Look for misplaced hardware, loose bolts, or hand tools left behind. A quick visual check easily prevents catastrophic startup failures.
Next, perform rigorous fluorescent dye testing. This critical step proves your installation holds a perfect airtight seal. Inject specialized fluorescent tracing powder into the dirty air duct upstream. Run the main exhaust fan briefly. Keep the pulse-cleaning system turned completely off during this phase. Afterward, shut down the fan and inspect the clean air plenum using a high-powered blacklight. Any glowing powder clearly indicates bypass leaks. You must reseat those specific leaking items immediately.
Finally, focus on establishing the initial protective dust cake. Start your system under normal fan load. Leave the pulse-cleaning mechanisms turned completely off. Allow particulate to build up naturally on the fresh media surface. Wait patiently until the system differential pressure reaches the manufacturer's recommended baseline. This initial layer forms a crucial protective barrier for the underlying fabric and enhances overall filtration efficiency.
Choosing the right manufacturing partner directly impacts your maintenance frequency. Evaluate vendor expertise carefully. Look for manufacturers who actively ask about your operating temperature, gas chemistry, and air-to-cloth ratios. Avoid suppliers who merely ask for generic part numbers. True experts engineer specific solutions based on your exact airflow dynamics and unique facility challenges.
Assess their manufacturing quality tolerances physically before placing large bulk orders. Request a sample to inspect the internal stitching and seam welding. Check the snap band tension manually. Poor manufacturing tolerances inevitably lead to immediate installation failures. A weak snap band simply will not seal against the tubesheet, regardless of your personal installation skill.
Prioritize suppliers who focus entirely on operational longevity. High-quality media construction withstands highly aggressive pulse cleaning cycles. Robust seams resist flex-fatigue over thousands of hours. Selecting a premium vendor drastically reduces the tedious labor associated with frequent changeouts. You minimize the severe risk of unexpected, profit-draining downtime events and ensure continuous environmental compliance.
Filter replacement stands as a highly strategic maintenance event, not just a routine monthly chore. Approaching this task casually invites operational disaster. Proper preparation ensures worker safety and protects your capital equipment from abrasive dust bypass. Rigorous installation techniques guarantee peak performance.
Pairing a meticulous standard operating procedure with the correct filter media drives true long-term reliability. We highly encourage you to request a professional media analysis soon. Consult a dedicated application engineer to source the exact filtration products your specific operating environment demands. Taking this proactive step secures your operational efficiency and safeguards your regulatory standing.
A: Replacement frequency heavily depends on your specific application, daily hours of operation, and ongoing differential pressure trends. Most industrial facilities replace their filters every one to three years. Continuous high-heat or highly abrasive environments often require more frequent replacements to maintain peak airflow and prevent sudden bypass emissions.
A: We strongly advise against washing them for most industrial applications. Washing typically destroys sensitive chemical treatments applied to the media. It also shrinks the fabric, heavily distorts the size, and permanently compromises overall filtration efficiency. Replacing them guarantees reliable regulatory compliance and consistent equipment safety.
A: Immediate failures usually stem from preventable installation errors. Common culprits include torn fabric from sharp cages or completely unseated snap bands. Severe blinding also occurs instantly if you turn on the pulse-cleaning system before establishing a proper protective dust cake on the fresh media.
A: Look for persistent operational symptoms. If standard bags constantly slip out of the tubesheet, or if you experience high pressure drops despite installing new filters, you likely need a custom fit. Custom designs also solve complex issues when your facility's operating conditions change drastically after the initial equipment installation.